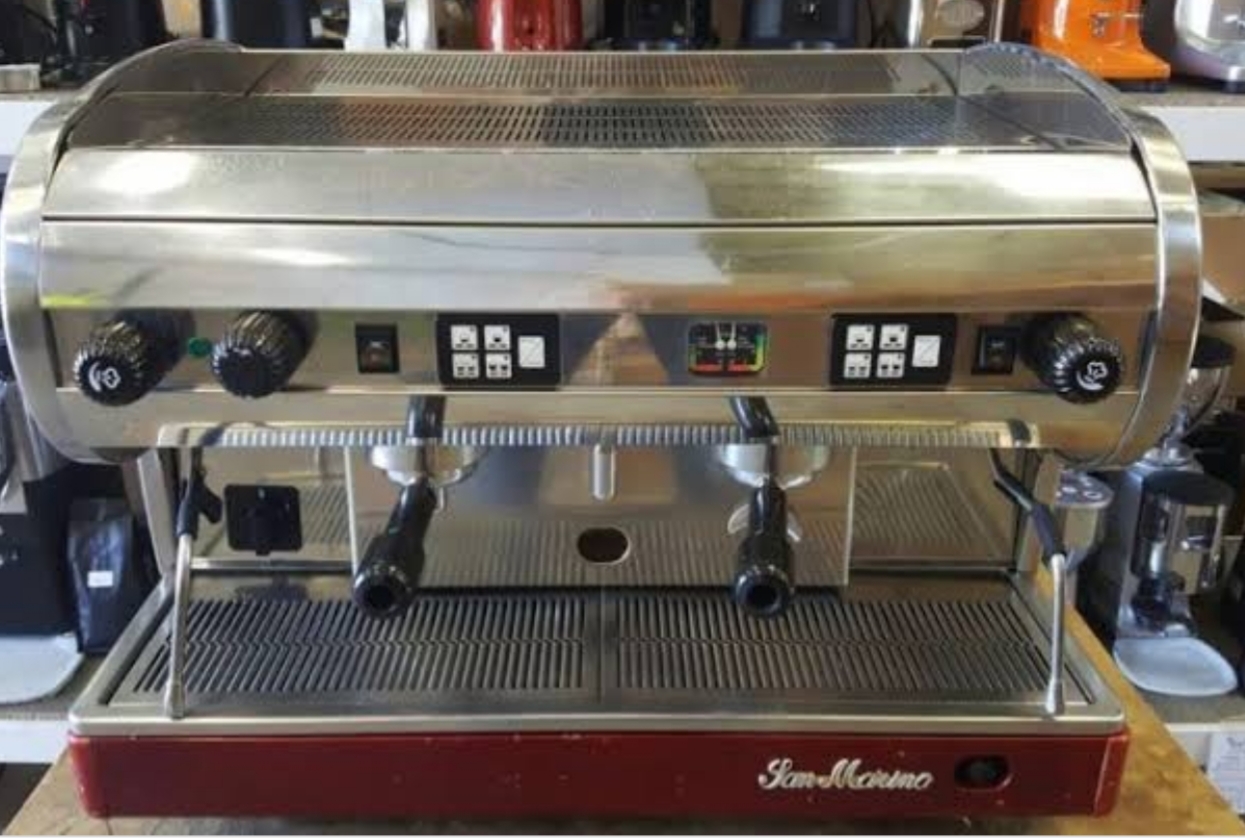
I have a 2 group commercial coffee machine that operates at 220/240v 50Hz 20Amps.
I would like to be able to power the machine up and down using Home Assistant/Voice Control (say interfaced with Alexa). It takes approx 30 mins to preheat machine before you can expect a quality coffee.
I’d like to use an Arduino to control a relay (of a recommended type) to perform this switching function. The Arduino would need to be able to communicate over wifi with HA to understand the required switching operations.
Any suggestions as to the best approach would be gratefully received
The Sonoff would be a great option except that it is limited to 10 apps. To switch a 20 amp load, it will require a more robust relay or probably even better, a contactor. That takes this project more into the industrial world. There are lots of relays available that will work. I am at work and dont have the chance at the moment to look for suitable ones but will do so when I get home. The question in this is what to use for the HA and Alexa integration. I am not in that part of the automation learning curve yet so I am not sure what device to couple with the relay. Will see what I can come up with…
I have quite as few Sonoffs and they would do well but was aware of the amperage limitation.
Getting the safe relay/switching option is what I’m stuck with at the moment - I can work out the automation to start up the machine 30 mins before alarm goes off or to start it up when up for a good cup of this coffee without having to physically go down stairs.
Always impressed with the collective knowledge of this group!
I was cruising around Ali Express looking at options and there are LOTS of them but this one looks pretty promising - 25a SSR
Also, if you wanted to simplify the automation and not have to do the coding for Arduino, I would use one of the Sonoff LV safe voltage units that runs off low voltage instead of mains as your trigger. You can connect the relays to your power cord for the coffee maker, then connect a 12v wall wart to the Sonoff. The Sonoff output will be 12v so that would be the coil voltage for the relays. It takes 2-25A relays (to cut both legs of the mains power) and a Sonoff LV. The Sonoff with Tasmota will integrate into HA. It can also be automated with Node Red and MQTT.
That has me thinking… when I get home tonight i am going to take a standard Sonoff Basic and see what it takes to make it a LV model. Would probably take a little soldering to bypass the mains power regulation so that you could feed the thing 12v and have the 8266 in it get 3.3v. Hmmmm
That took longer than I figured it would but I think I sorted it out. There is a wiring schematic for the Sonoff Basic online HERE and I used that for reference. There are a couple routes you could go:
You CAN remove the rectifier, disconnect the transformer leads from the input to the low voltage side of the board and solder in a bridge. You could feed the board 5v and it would work just as before but with a 5v output. I took some video of my board and can create a tutorial of sorts on how to modify it (I so hate what the word ‘hack’ has become ), if that is of interest to anyone. I have a Basic I wouldn’t mind trashing for the cause…
OR>>> and I really suggest this route…
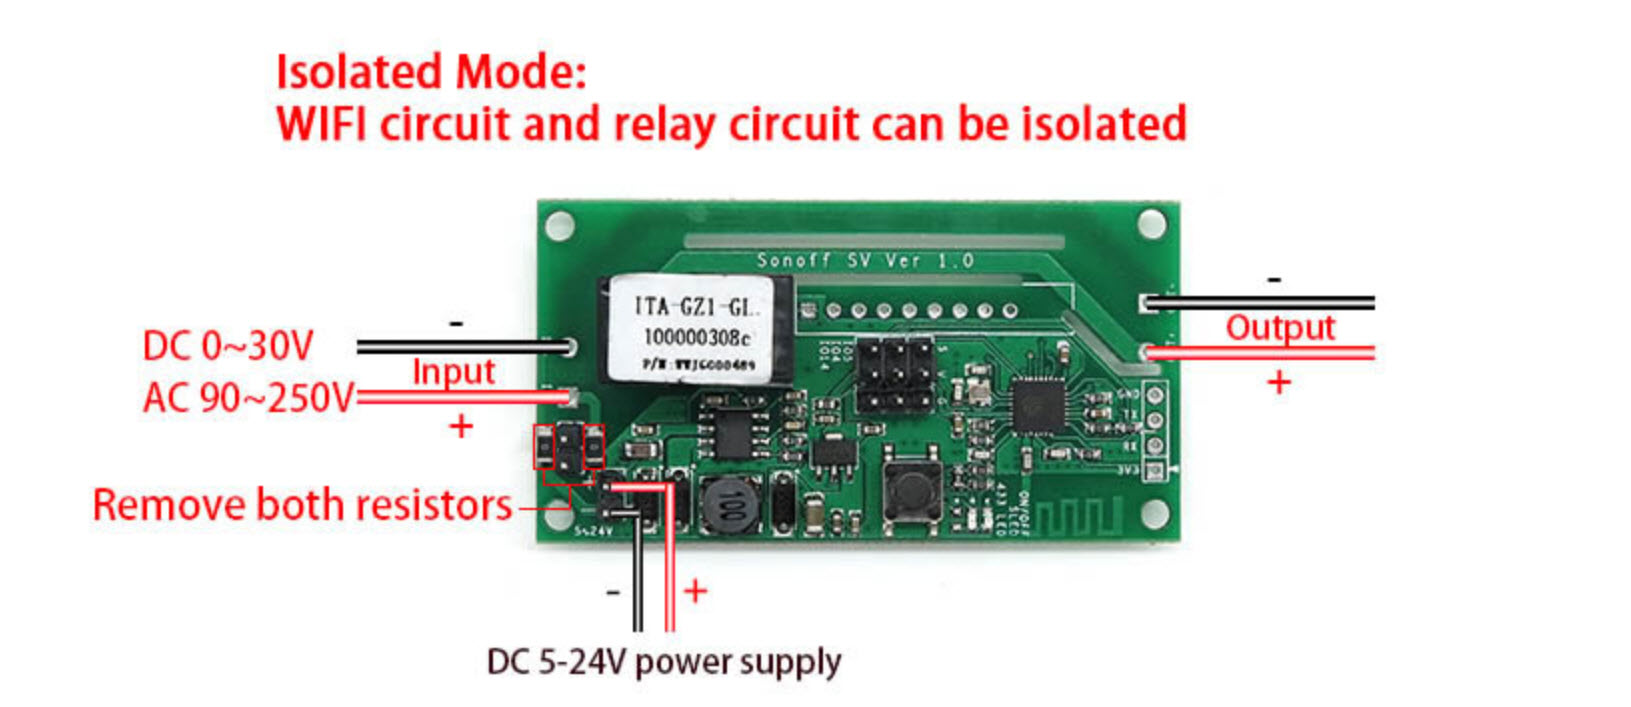
You SHOULD just buy a Sonoff SV board. They are around $7 (US price onAliExpress) and they would allow you to supply it with 12v wall wart and have 12v output from the Sonoff to trigger the coils on the mains voltage relays I suggested previously. They can actually be supplied from 5-24v and still do their job. The pic is below…
After doing some digging, it looks like the SSR’s I listed above require a stupid large heat sink because they are solid state. You need to go with a more conventional SSR setup. The hitch in using these is that they are required to be connected to a heat sink of some sort. They are usually bolted on to a metal control cabinet panel or onto an aluminum plate in the machine they are controlling. So this would be a better option for you but you need to put them on a heat sink plate. If your coffee machine is on a metal cabinet, its a pretty easy install. If not, then you need to figure out how to dissipate some heat. THESE
The other option is an industrial “contactor” which is just a relay in sheeps clothing. These don’t create the heat BUT they usually have 24-36v coils so a wall wart is out of the question. THESE
Whilst is has a metal chassis, that you may be able to attach a heat sink, I was aiming to have any switching/smarts external to the machine so that I wanted to change it over or to otherwise replace it, I just needed to plug in the new machine and plumb the water components etc.
Seems every time a solution is within reach there is a “gotcha” in the wings - like the bigger coils needed. I really do appreciate the effort and thinking that generates from this group.
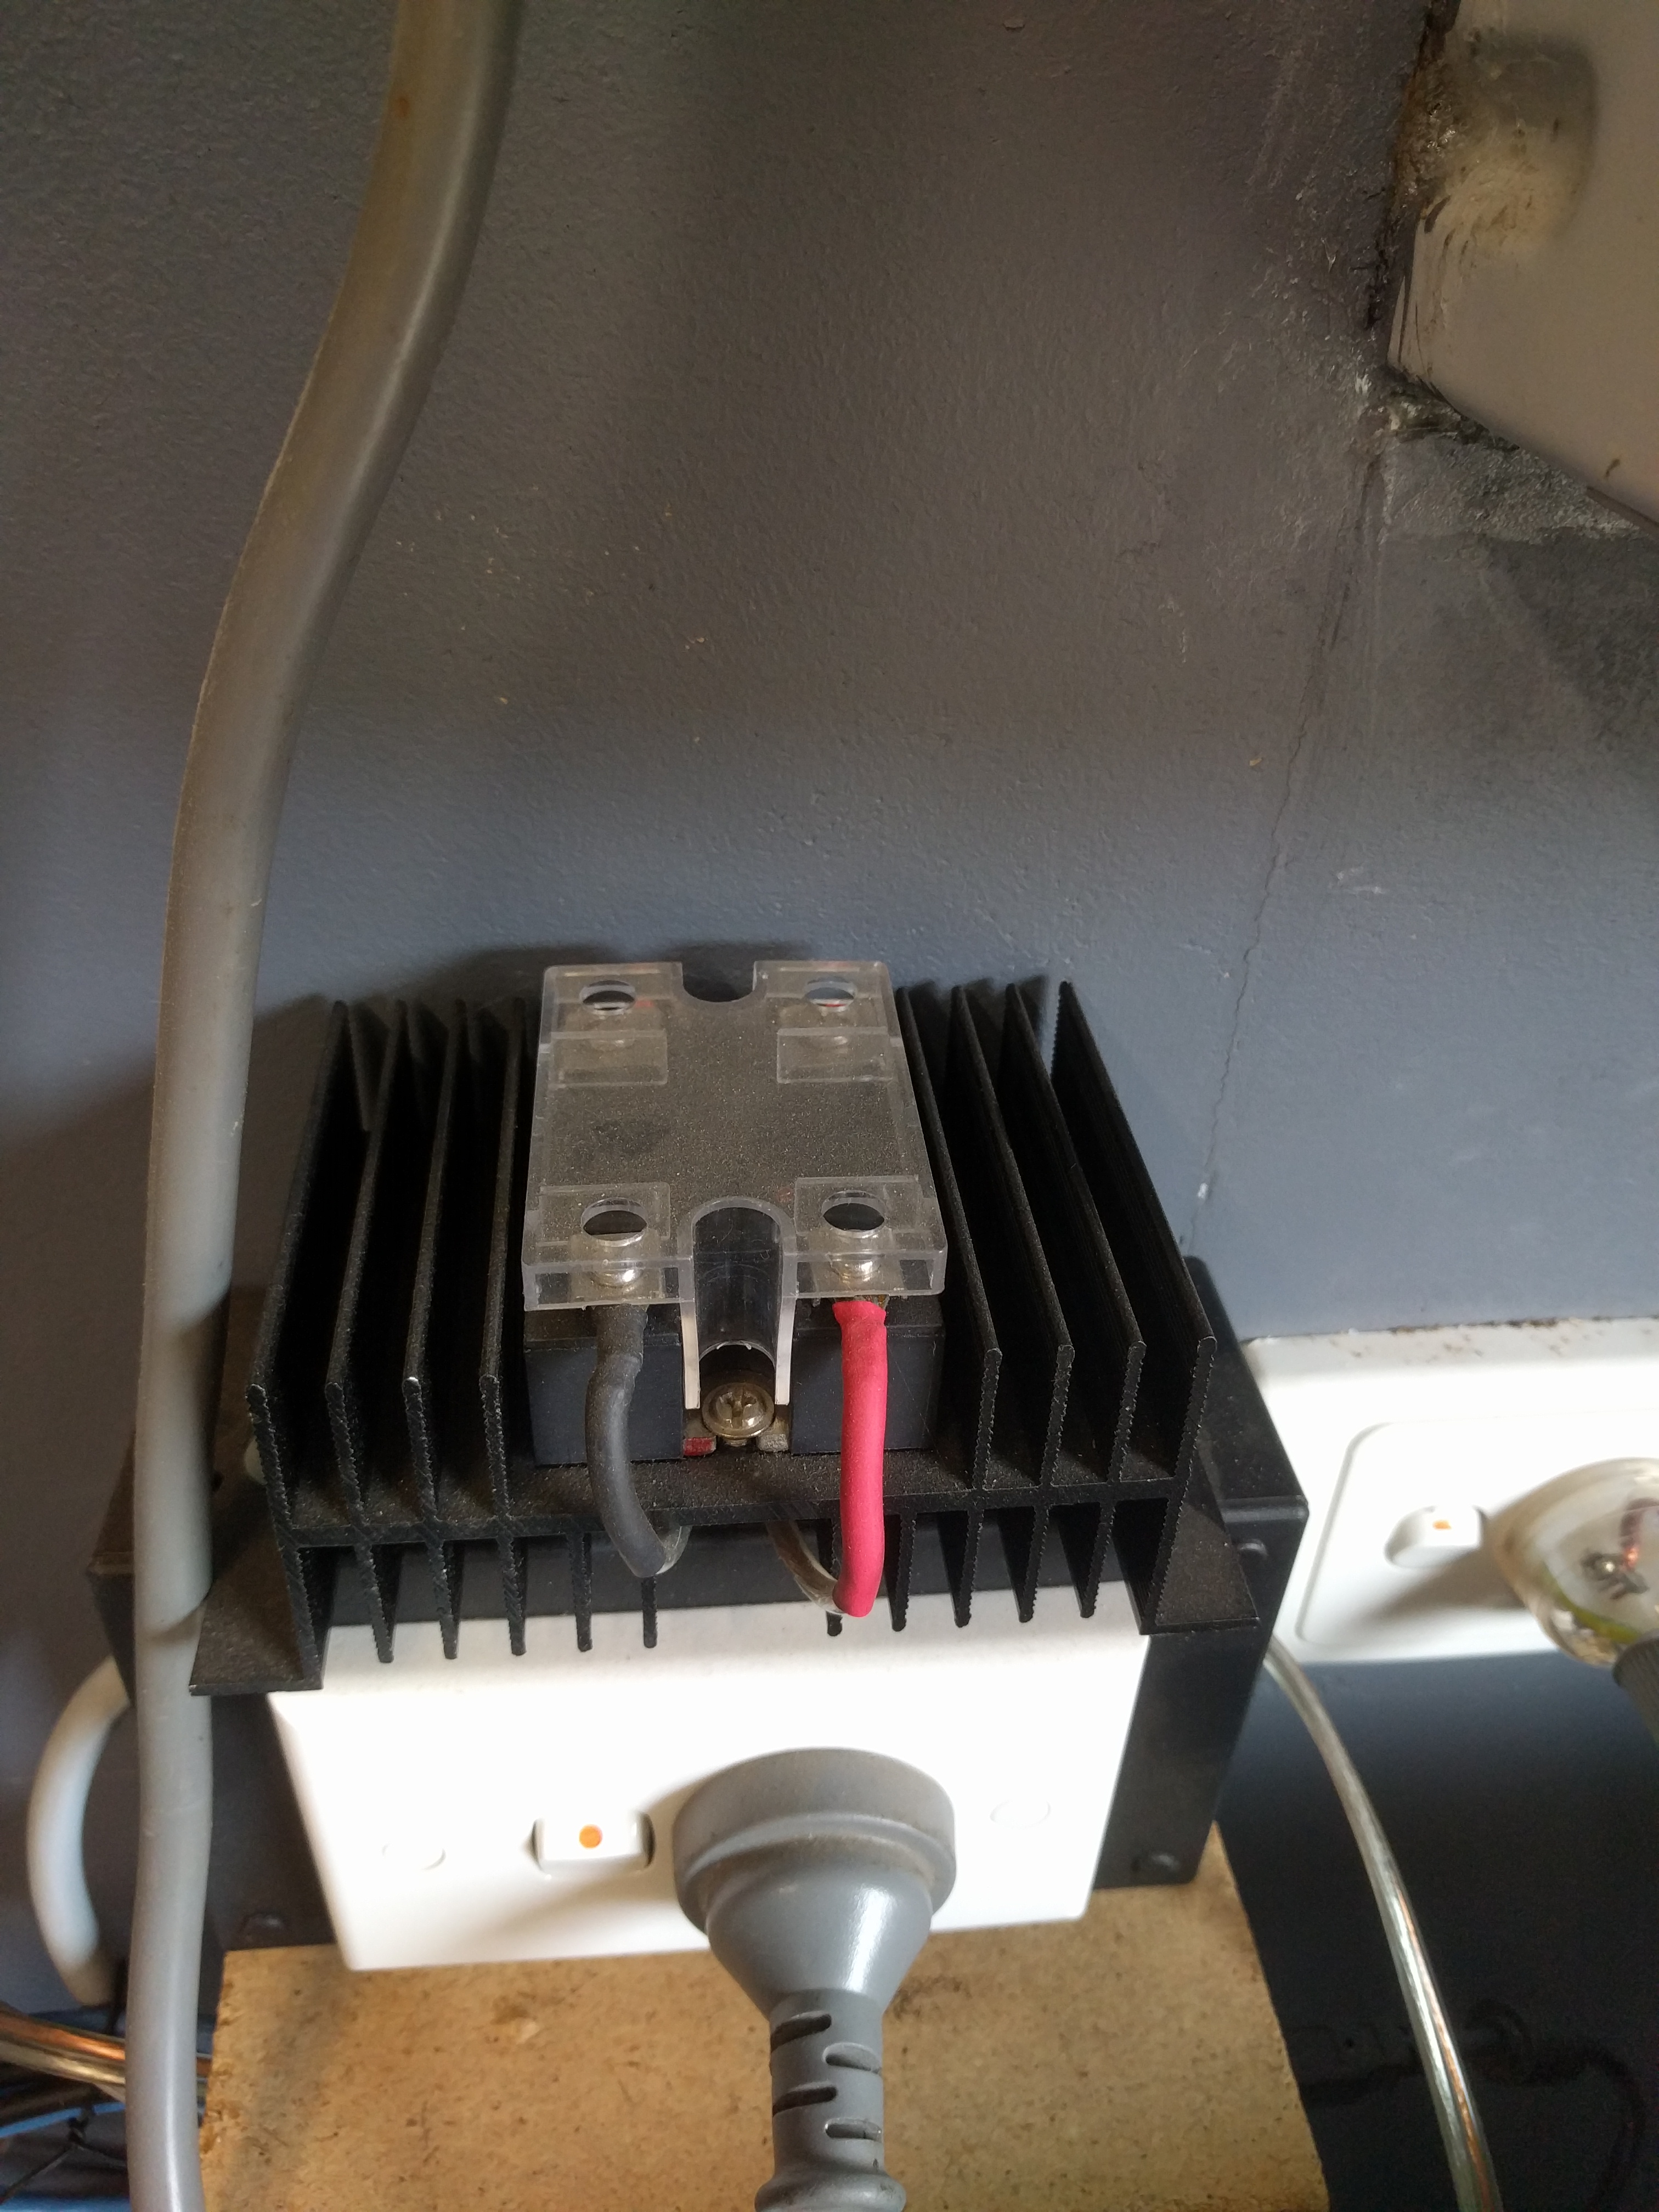
A Solid State Relay is how I’ve controlled my 15Amp wall shaker for the last 6 or 7 years. Inside is a 5 volt power supply to drive an ESP8266 (Wemos D1 Mini), a 12 volt power supply to drive the SSR and a small relay to switch the 12volt supply on and off. I did try a small DC - AC SSR, chained with an AC-AC SSR early on, failing to realise you actually need a reasonable load before an SSR will bias itself on. I also used to run the SSR straight off the 3.3volts of the D1, but that’s technically only just in spec and eventually it stopped triggering it.
Here’s a shot of the built device. I’ve got some build pics somewhere.
Exactly! It isn’t a complicated device really. The “gotcha” in this is the amperage. If it were slightly less, a Sonoff alone would do it. But the amperage requires a much more robust device for the power switching and that kinda goes outside of the average DIY or techy automation project. Not a lot though. It just needs a little more ooomph to get it done. An SSR like @techman83 is showing is the answer, but it requires a heat sink of some sort. A ‘contactor’ doesn’t. Either way, the job is easily accomplished but takes a little amount of jiggering to accomplish. BTW… you can get away with doing only one SSR. I just prefer to cut power to both legs of a 240 circuit. Not totally necessary though. The contactor option does that by default as it is a 3 pole relay in which both legs go through it by design. So that only requires 1 anyway.
The “controller” can be an ESP of some flavor with some code or it could be a Sonoff SV allowing you to use only one power supply at 12 volts. But again, it is a simple and not expensive endeavor. Just ‘some assembly required’! And none of it has to be attached directly to the coffee machine and doesn’t need you to modify an outlet. Just build your module, cut the cord, wire it inline and plug the cord back in. Or, do like shown above and wire it all with it’s own outlet to plug the coffee maker into and it is effectively a power strip with one outlet.
I started building the video on modifying a Sonoff Basic to turn it into a kind-of-Sonoff SV. It was a challenge I had to rise to
If I were to build it now a SonOFF with a 240v contactor would be high on my option list to tackle it. sick it all in a sealed box with a plug going in and a socket going out. No need to mess with multiple power supplies, relays and anything that requires a heat sink to ensure it doesn’t overheat.
The one pictured is not something I’d install inside a house. It’s out in my locked shed, up out of reach of any young inquisitive hands and the shed is not anywhere near the house if it decided to let out the magic smoke in a spectacular way.
I agree. The SSR path is far sketchier than the contactor route.
HOLD ON JUST ONE DANGED MINUTE!!!
I just realized I had a brain fart!!! Use a Sonoff Basic and just get a contactor with an AC coil!!! How in the heck did I miss that? They make them with 120 and 240 volt coils. Sheesk, I have low voltage on the brain. Feed your Basic as usual, use the output power to run the contactor. Easy!
Thanks for all the input. Sorry for being off the air for a while (had to have major back surgery - recovery time, unable to lift, bend etc. etc.) so was unable to progress it until a couple of weeks ago.
A quick reminder: It was a 2-group commercial coffee machine that requires 240V and 20A to operate. It has a dedicated circuit from the switchboard. It takes 30 mins to properly heat up the boiler, group heads etc. to get a proper espresso. I wanted to get Alexa or Home Assistant to turn it on 30 mins before I had to get out of bed.
The other criteria I had was that I didn’t want to interfere with the existing 20A circuit, nor did I want to modify the coffee machine. SWMBO often talks about moving - so didn’t want to leave any solution behind. Also, from time to time, I turn over my coffee machines and didn’t want to go through the effort having to restore the old machine and redo the mods to the new machine.
Guru_Of_Nothing suggestion of using a contactor was the missing piece that made the project simple to execute.
The project bill of material was:
6 bay surface mounted switchboard with DIN rail - it was going to be located where inquisitive fingers from guest’s children may have access - so it needed to be enclosed
20AMP 3 flat pin plug (240V)
20AMP 3 flat pin socket (240V) - could only find a switched power outlet
220-400V 4 pole NO contactor (that made economic sense - go figure) with a 220/240V coil
10AMP circuit breaker
Sonoff Basic, and
Some 20AMP cable
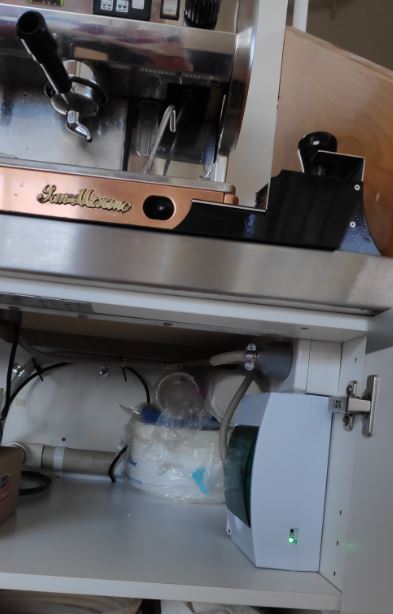
First thing was to move the existing 20AMP outlet to a little higher in the cupboard under the coffee machine so that the switch board enclosure could snugly fit underneath it.
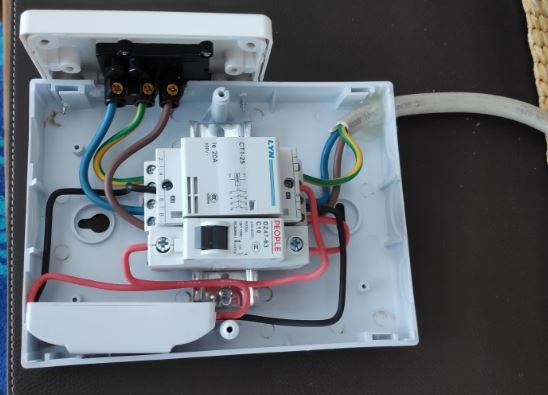
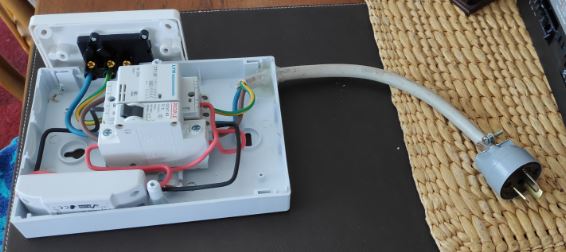
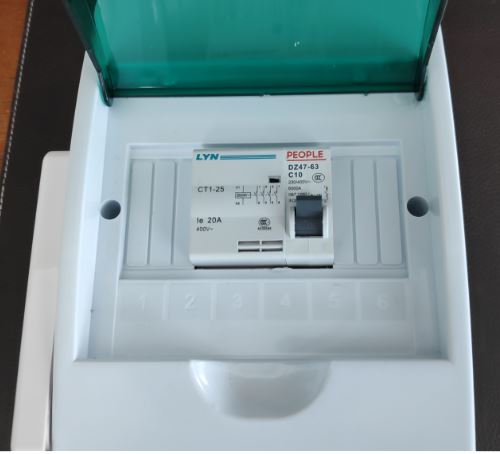
here are some photos of the automation enclosure:
Since the contactor had 4 poles, I switched the active, neutral and earth, the output side of the contacted was just wired straight to the 20AMP power outlet attached to the side of the automation switch box. On the incoming side of the contactor, I took a feed from the neutral to the neutral of the Sonoff Basic. From the incoming active of the contactor I took a feed to the 10AMP circuit breaker to protect the Sonoff and also to be easily able to remove the power from this part of the circuit (I know, I could always pull the plug from the original power outlet ). The other side of the 10AMP circuit breaker went to the active input side of the Sonoff Basic. The output of the Sonoff went to the coil terminals of the Contactor. I also cut a piece out the automation switch box so that I had easy access to the Sonoff’s on/off button and the WiFi connection status LED.
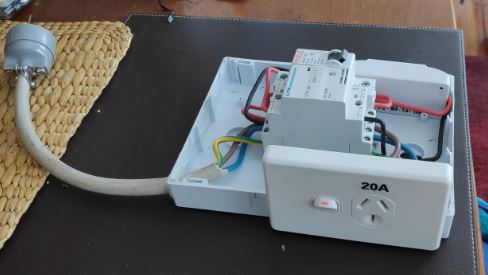
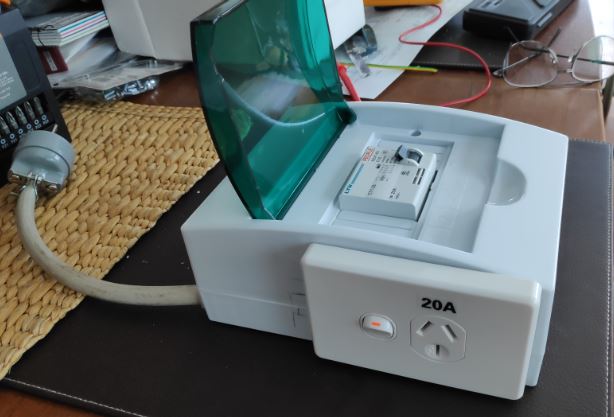
The completed automation switch box:
The automation (switch) box in situ is shown in this photo:
Absolutely stellar! That is the perfect solution to the situation. No power outlets or coffee machines were harmed in the making of this project Yeah! It’s great because it’s a modular, portable solution that could actually be used anywhere at all. Hopefully lots of other people will see this and use your ideas to create their own Sonoff powered high amperage device controller. Kudos!
Good catch @FrankMc I missed that he had run the ground/earth through the contactor. Didn’t read well enough. In case this doesn’t make sense @Hardergm, it’s because it is possible to get power through the contactor to your machine if one of the contacts was to fail closed. If the hot leg was the one to do so, power would search for a path to ground. If there was some sort of failure in the machine that put that voltage to the chassis, anyone touching it wouldn’t be protected and could be shocked or killed. The ground/earth is always supposed to be connected a long as there is a power potential, i.e. unless the machine is completely unplugged. Connect the ground outside of the contactor and problem is solved. Sucks to have unused contact points in the device but it is difficult to get single phase contactors with any kind of amperage capacity.


 ), if that is of interest to anyone. I have a Basic I wouldn’t mind trashing for the cause…
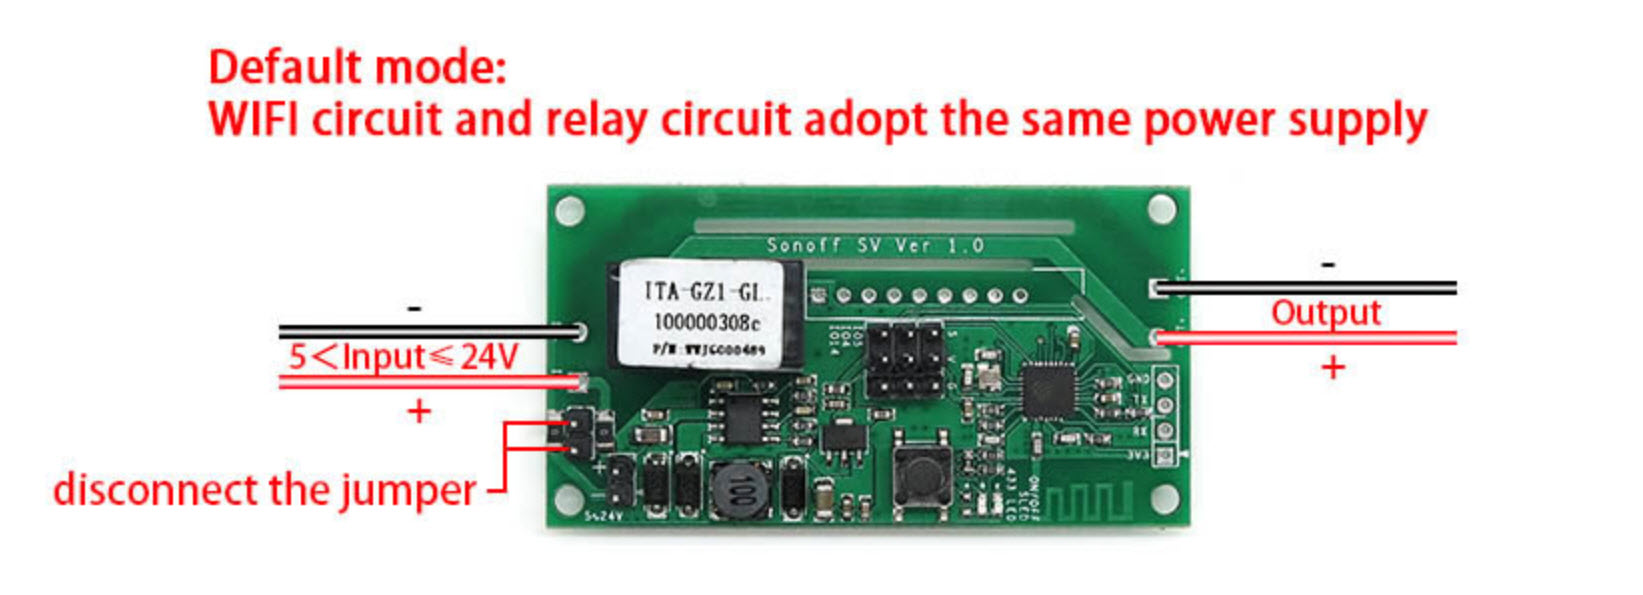


 Though I could have been far clearer
  (almost time for another coffee I think!)
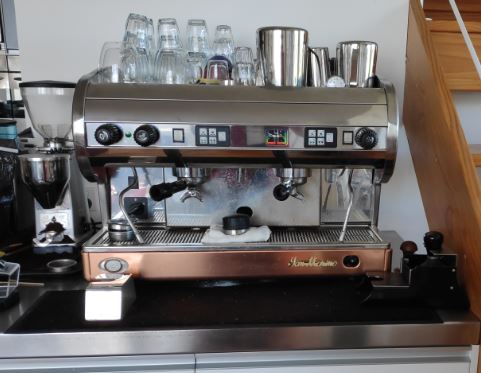
 Yeah! It’s great because it’s a modular, portable solution that could actually be used anywhere at all. Hopefully lots of other people will see this and use your ideas to create their own Sonoff powered high amperage device controller. Kudos!