Dimmable LED downlights

I’m replacing my entire house lighting with arduino controlled dimmable LEDs, except in the bathrooms as they’re 3-in-1 light/fan/heat lamp units.

The aim/purpose is to have rules governed house lighting. Come home: lights come on automatically, room sensor is activated: lights come on and dim according to time of day/night. Room is empty: lights turn off. Etc.

I’m running a Raspberry Pi serving: Node-RED, MQTT, Node-RED HomeKit (HAP-NodeJS). The homekit plug-in allows me to emulate various HomeKit devices. Which allows for Siri integration - which is not cloud based so it’s very responsive!

As well as Superhouse’s lightswitch controllers to replace all the “dumb” light switches around the house. Which I’ve written an Arduino library to handle single, double press, and hold events. It’s on Github.

Hardware:

I’ve started to put together dust proof enclosures to house the DXM decoders into groups of 4 per main room, with a few single decoders/enclosures for smaller rooms like pantry, landry, passage way etc.

DMX runs in a daisy chain with an address/channel set per decoder via the binary dip-switches, so each enclosure will be wired with an input and output CAT5 female jacks. Which snake around to each decoder inside the enclosure. I haven’t cut the holes for the power cables yet in those photos, I imagine I’ll do the same as I’ve done for each RGB LED cable: drill holes, insert rubber grommets.

Each enclosure will then be chained together with cat5 cable from one’s output to other’s input. With the first enclosure chaining from the server rack with the Arduino DMX controller.

I’ll post more later about the software side of things.

3 Likes

Nice! I am amazed at how low the costs on DMX stuff has become over the years. I guess when they are knocking it off over seas that helps a lot. DMX used to be commercial level gear but its great that we now have the power (aka, Arduino and Pi) to use that type of setup for our own automation projects. Looking forward to seeing it come along.

Very nice indeed!! will be following this! I have a suggest on how to mount your rj45 sockets if you like… grab yourself some architrave single gang plates and mount them on. should work a treat

@Guru_Of_Nothing, DMX is older than dirt at this point. It’s an open standard that’s been around since the mid 80s so it’s fairly well understood. Even 10 years ago you could by smoke machines and low end disco lights for well under $100. The high end stuff has shipped with ArtNET (and more recently sACN) for a while now so DMX is kind of old-hat in some professional applications.

Speaking of the standard, @chris don’t forget to whack a 120OHM resistor across pins 1 and 3 on the last output of your run. People get away without it more often than they should, but DMX chains have been known to do funny things without termination.

Great outside-the-square use of DMX though.

I half though about some kind of DMX based lighting system too, but with the less DIY approach of slapping a Redback Wallmount in a cupboard somewhere and homerunning my light fixtures back to that. That got too expensive very quickly, and considering everyday electricians are invariably useless at theatrical installations, the last thing I wanted to do was leave the potential next owner with a system neither they nor their electrician would understand.

Keen to see how this turns out. Are you in Aus? Any issues with the residential electrical codes that you know of? I’m surprised this doesn’t violate massive chunks of the Aust Standards.

@CJFoss So you are implying I too am older than dirt? LOL! I feel it so that is probably somewhat true. DMX came out when I was in High School and we had a little bit of the gear at the Haunted House production group I was part of and it got me all excited about stage lighting and stuff back then. It was stupid expensive though so I never got my hands on it. I have seen quite a few people that do the big Christmas lighting shows on their homes go to DMX for the sync’ing and what not and that peaked my interest again but I moved to rural property where only the wildlife would see the lights so I dropped the idea of getting into the gear. I find it especially cool that @chris is using it for his house lighting. It solves the problem of dimmable lighting in a hardwired lighting scheme for sure. And when he comes home, he can shout, “Let the show begin!” :upside_down_face:

I’ll take any pro-tips. Thanks!

@CJFoss Once the sparky has installed the mains power sockets for the individual DC adapters (same installation as typical downlights), and cabled the cat5 to each enclosure. What violations would I need to be aware of? I haven’t been able to find any material without having to shell out $200 for a code of conduct PDF :dizzy_face:

This looks like a very nice setup! I’ll be very interested to follow your progress.

The button press library is a great idea. I’ve just added a link to it on the page for Episode 25, and I’ll write a blog post about it too :slight_smile:

1 Like

Now that people might be actively looking at my multi-function library I thought I’d better update it a little.

  • I’ve made the debounce rate an accessible variable, allowing you to set the value per button instance in-case of different wire run lengths.
  • Double-press, Press-hold duration are also configurable per instance.
  • Added better documentation to the readme file, and within the library files

Well that explains why @jon is our of PoE’s…

I’m also going to attempt this on a larger scale as I have just run out of ideas of how to dim @ 240V a.c at the right price on an intelligent system that is in it’s own eco system & have just placed an order for some parts today to trial, so I sub’d you on utub maybe your the next Jonathan Oxer? 5 followers and growing mate :slight_smile:

  • I read on another of your posts the light limit in the DMX light limit, also be aware that on a 512 single universe you’ll need to add a DMX splitter if more than a qty of 32 (Give or take) decoders are in series.

  • As for the terminator, shunt best to add one if your run is less than 40M, I get away with on small gigs but not in the bigger venues.

-Does the script your working with take into account additional DMX universes from a single controller reverting back to B1-B512 or continue on 513-1024?

-I know it is possible to get DMX to talk to 0-10 if in the future you want to add a different light fixture to the mix, I’ll be attempting to do some of the lighting this way, some raw DMX to LED Strip lighting and a few of the feature lights on a some DMX Dimmers.

I’m still trying to understand exactly how to set the system up but i figure as long as I run the cat5e to every switch and back to the databox, run an active loop like your electrician has and work it out from there… Thanks for your posts.

Hi @LegionX.
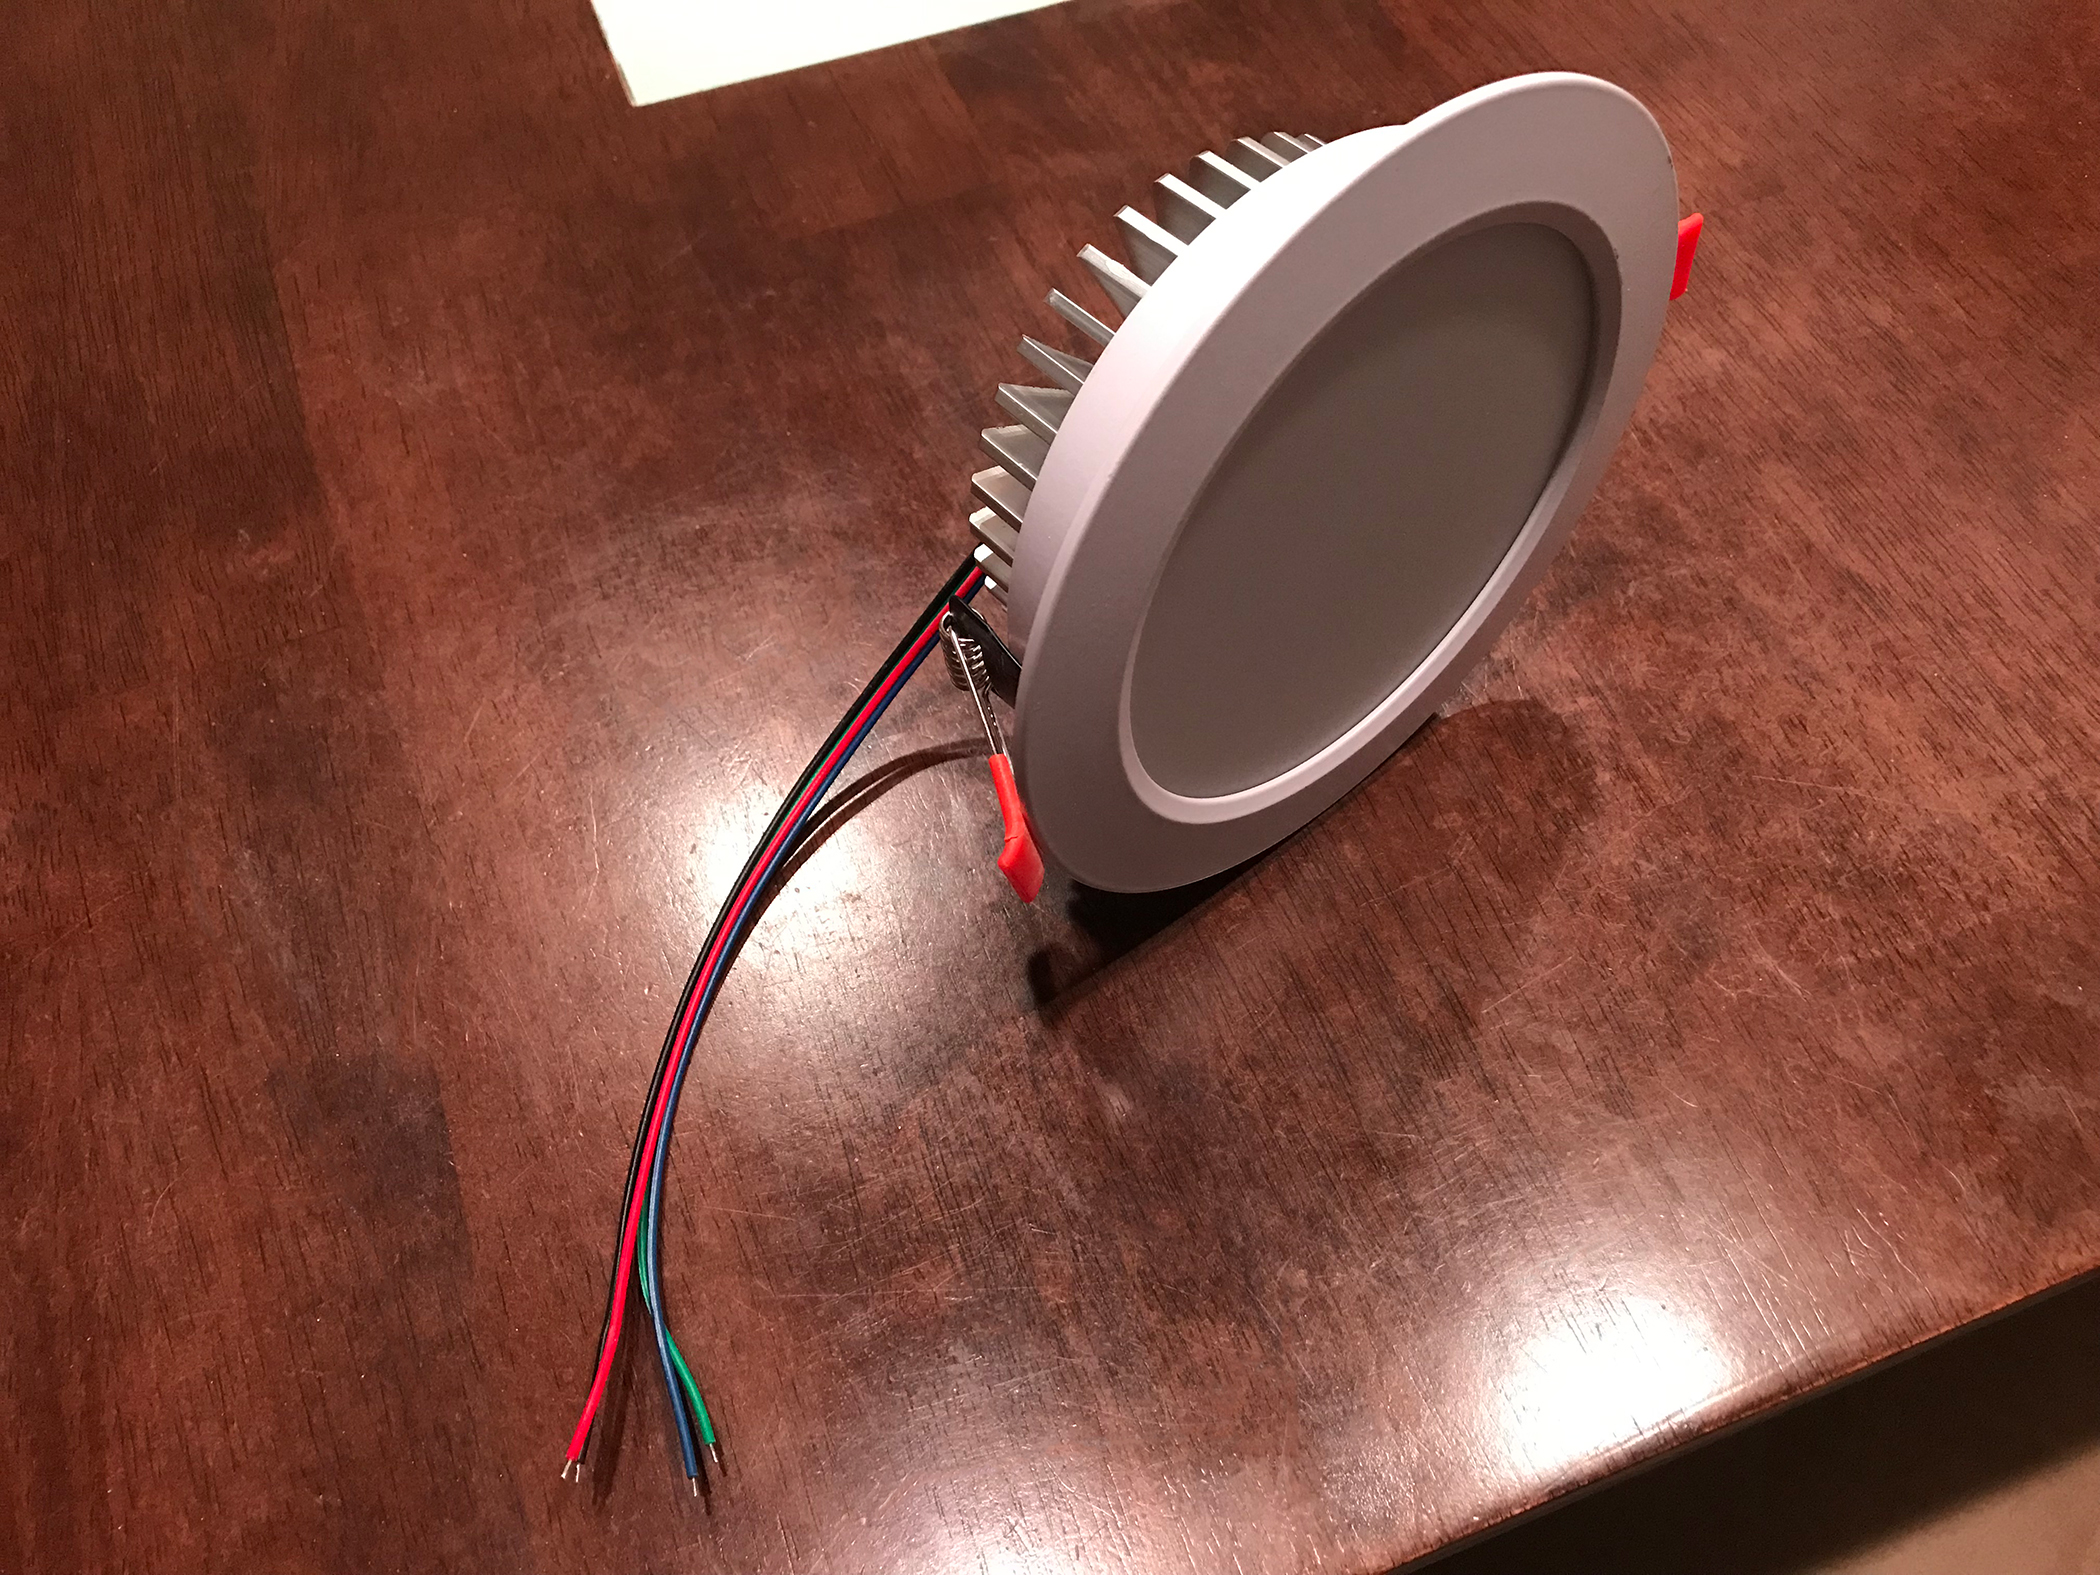
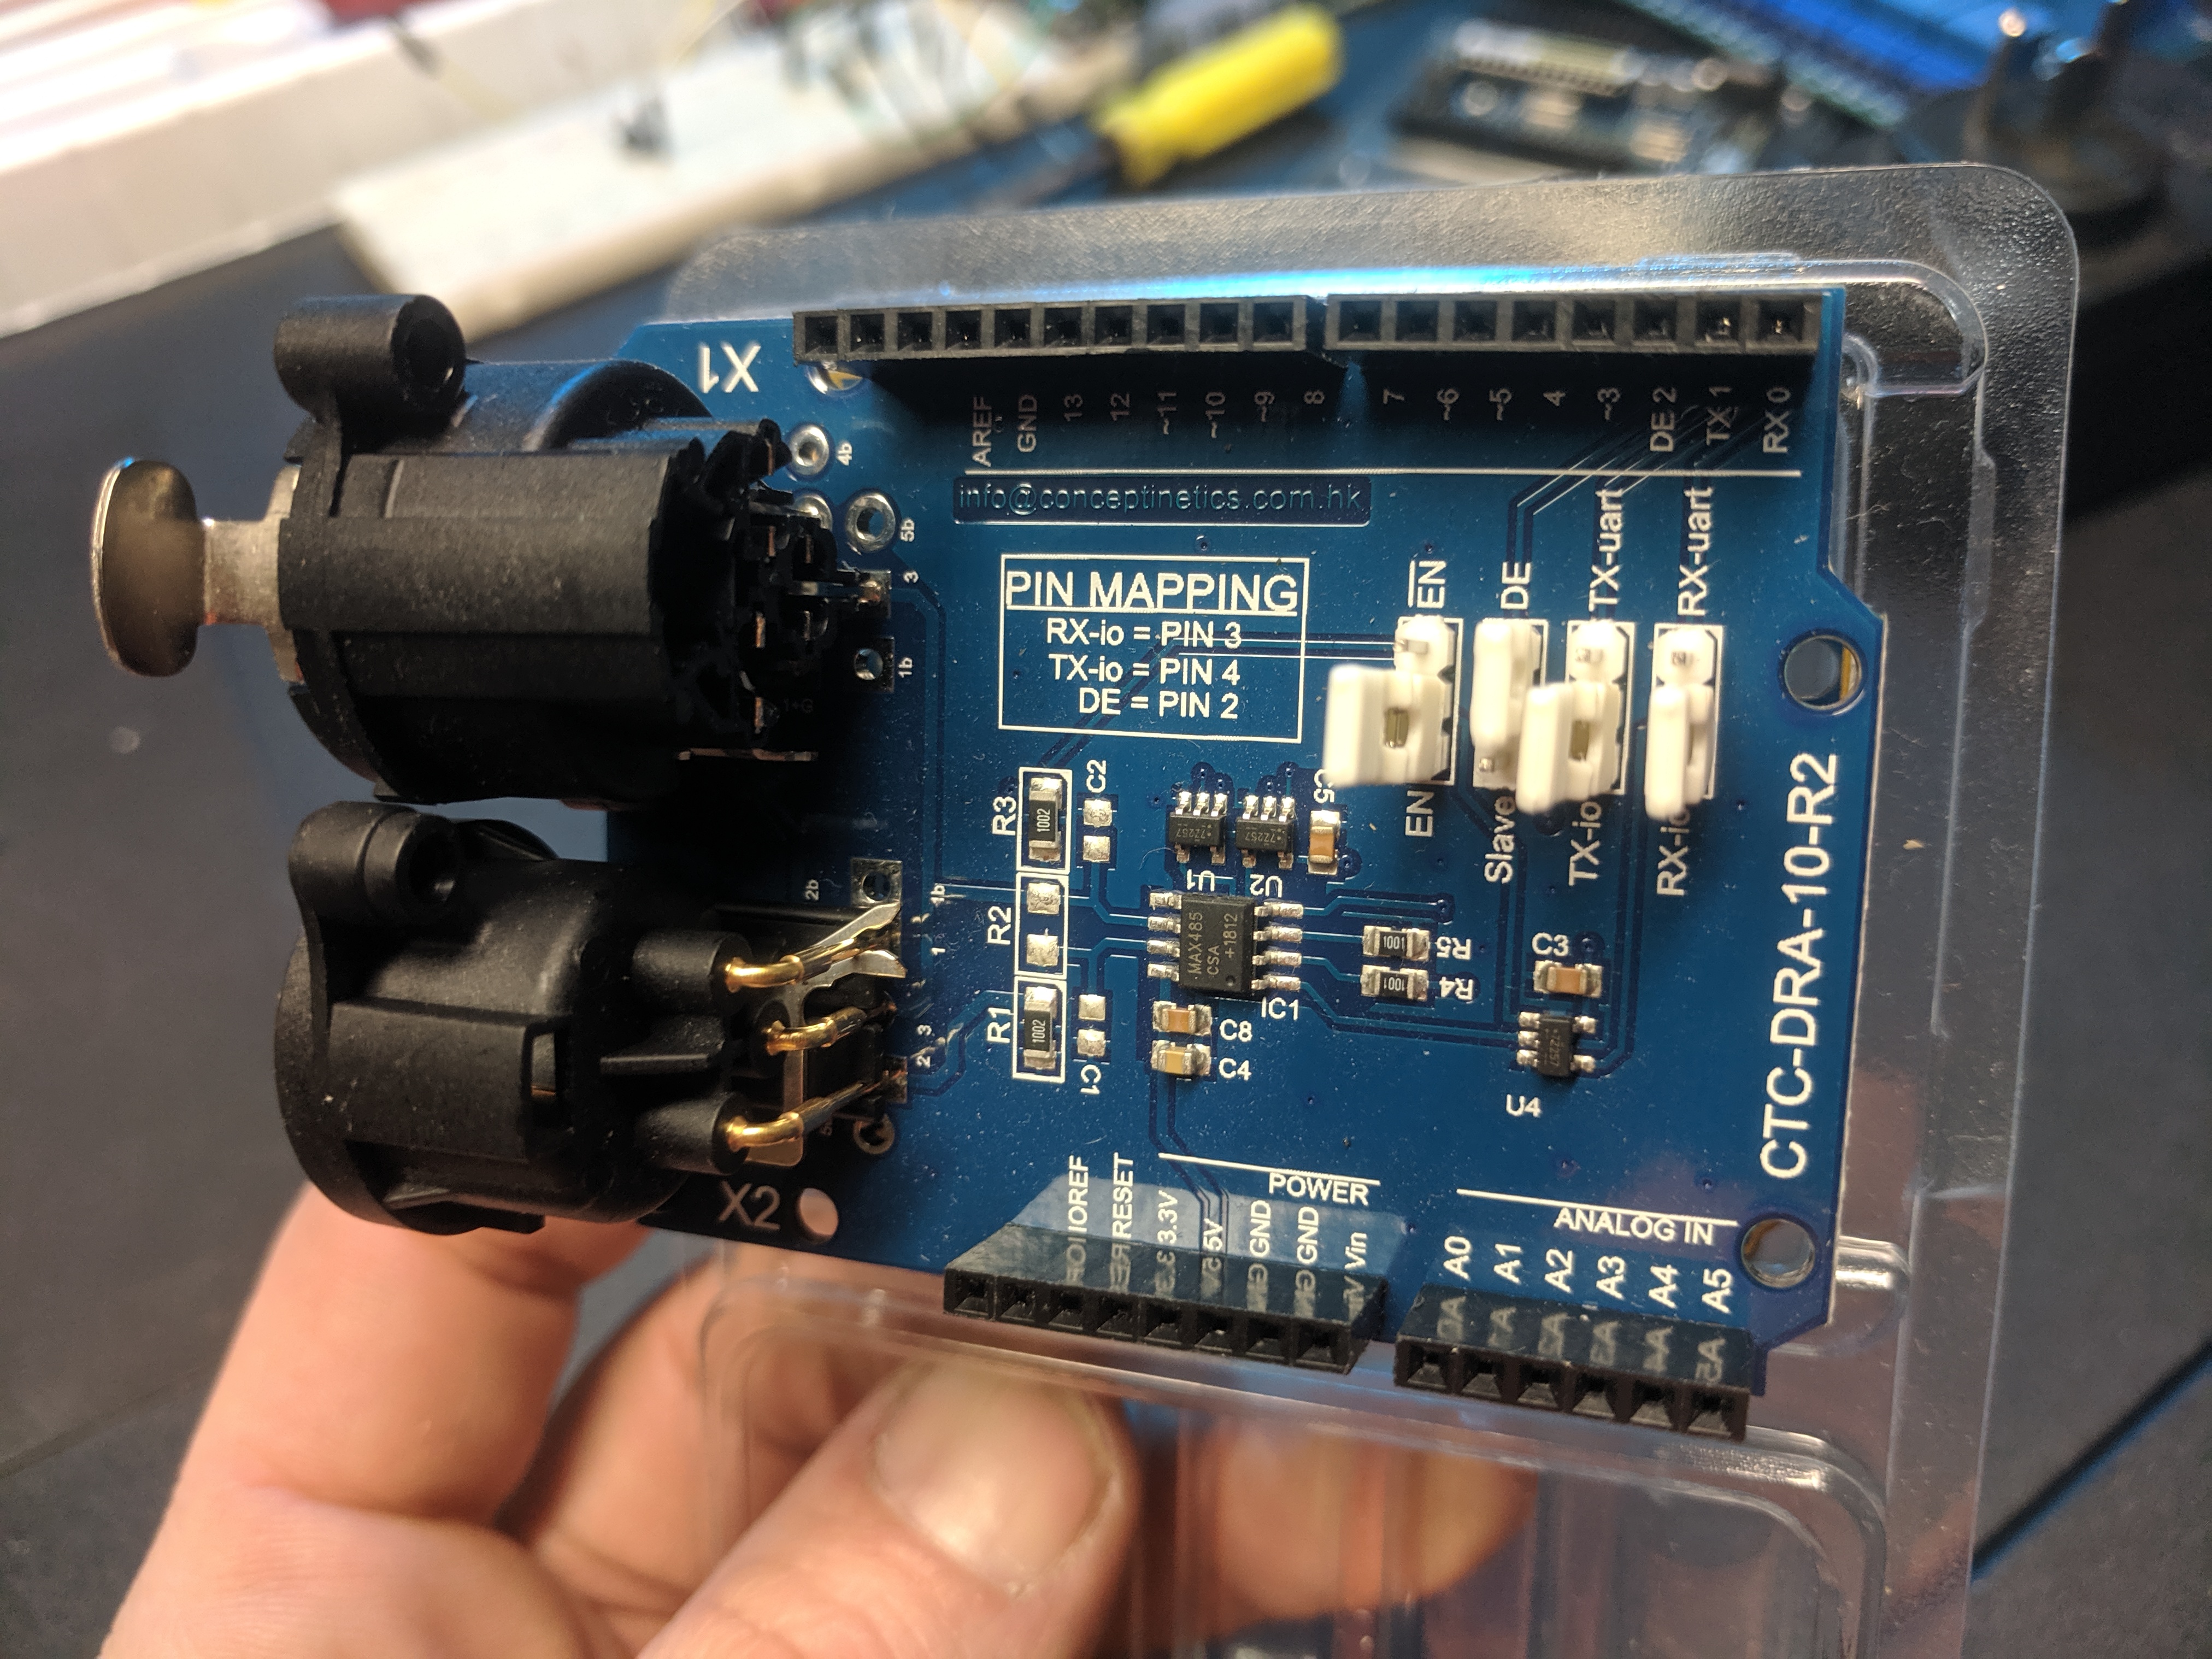
The Arduino DMX controller shield can only handle one universe (512 channels) with each downlight using 3 channels each (R,G,B) that’s 170 downlights per universe!

Which is far more than I’ve planned for my house. I’ve only got 40 downlights (and decoders) in total at this stage.

Another universe would require another Arduino and another DMX controller shield. Which would start the channels from 0 again. Not difficult to do in software - just assign the two (or more) Arduinos different MQTT channels each to listen on.

Here’s my current code on the Arduino:

#include <Ethernet.h>
#include <PubSubClient.h>
#include <DmxSimple.h>


// Ethernet https://www.miniwebtool.com/mac-address-generator/
byte device_mac[] = {0x16,0xB8,0x90,0x93,0x56,0xDA};
EthernetClient device;


// MQTT
IPAddress mqtt_ip(xxx, xxx, xxx, xxx);
PubSubClient mqtt(device);
String mqtt_client = "houselights";
const char mqtt_user[] = "xxxx";
const char mqtt_pass[] = "xxxx";
const char mqtt_sub[] = "device/house/light";


void setup()
{
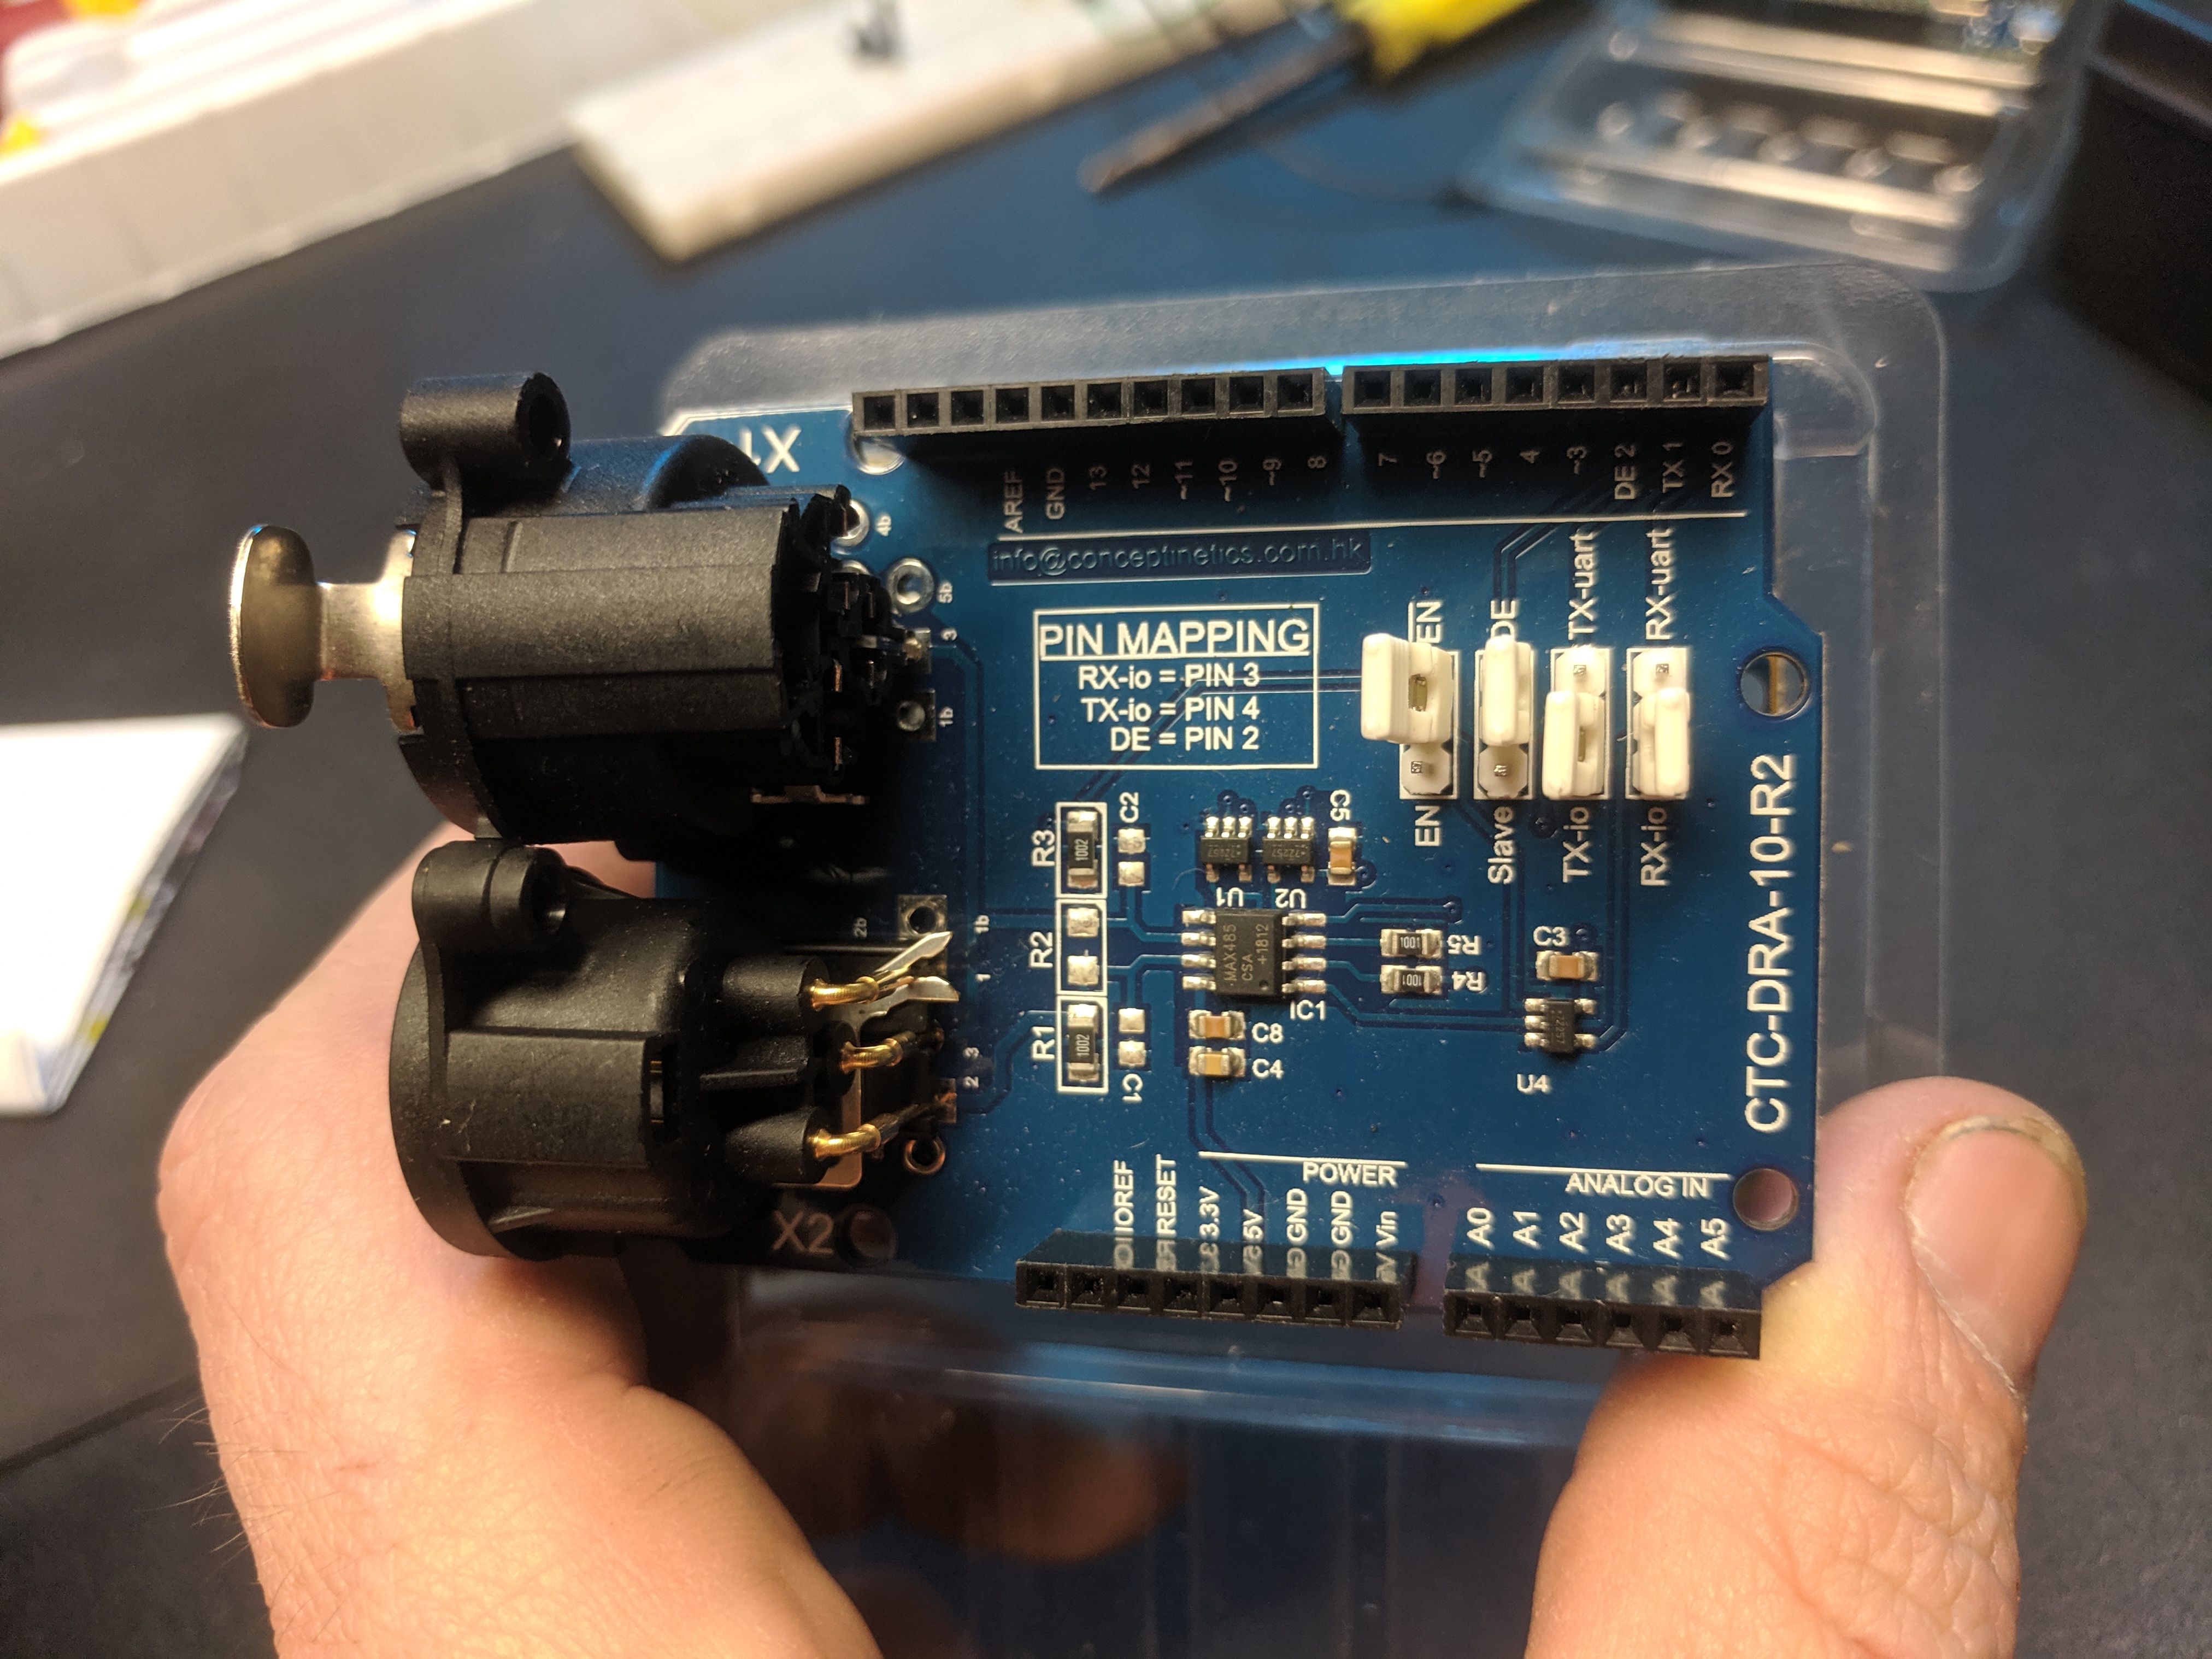
	// Configure DMX, Interface with the DMX shield on I/O pin 4 instead of TX/TR
	DmxSimple.usePin(4);
	DmxSimple.maxChannel(512);

	// DMX shield syncs with Arduino on I/O pin 2
	pinMode (2, OUTPUT);
	digitalWrite (2, HIGH);

	// Just for visual testing of network connection
	// All downlights 1% while we wait for network connection
	for (int i = 0; i < 512; i++)
	{
		DmxSimple.write(i, 1);
	}

	// Wait for network connection
	while (Ethernet.begin(device_mac) == 0)
	{
		delay(1000);
	}

	// Initializes the pseudo-random number generator
	randomSeed(micros());

	// Configure MQTT
	mqtt.setServer(mqtt_ip, 1883);
	mqtt.setCallback(mqttReceive);

	// Connected to network. All downlights off
	for (int i = 0; i < 512; i++)
	{
		DmxSimple.write(i, 0);
	}
}


void loop()
{
	Ethernet.maintain();

	if (!mqtt.connected())
	{
		mqttReconnect();
  	}

	mqtt.loop();
}


void mqttReconnect()
{
	while (!mqtt.connected())
	{
		mqtt_client += String(random(0xffff), HEX);
		
		if (mqtt.connect(mqtt_client.c_str(), mqtt_user, mqtt_pass))
		{
			mqtt.subscribe(mqtt_sub);
		}
		else
		{
			delay(5000);
		}
	}
}


void mqttReceive(char* topic, byte* payload, unsigned int leng)
{
	char channel[4] = "";
	char val1[4] = "";
	char val2[4] = "";
	char val3[4] = "";

	// Determine starting channel value, eg: 001 - 512
	for (int i = 0; i < 3; i++)
	{
		 channel[i] = payload[i];
	}
	channel[3] = "\0";

	// Determine first channel's value. Eg: 000 - 255
	for (int i = 3; i < 6; i++)
	{
		 val1[i - 3] = payload[i];
	}
	val1[3] = "\0";

	// Determine second channel's value. Eg: 000 - 255
	for (int i = 6; i < 9; i++)
	{
		 val2[i - 6] = payload[i];
	}
	val2[3] = "\0";

	// Determine third channel's value. Eg: 000 - 255
	for (int i = 9; i < 12; i++)
	{
		 val3[i - 9] = payload[i];
	}
	val3[3] = "\0";

	// Convert char to int
	int c = atoi(channel);
	int v1 = atoi(val1);
	int v2 = atoi(val2);
	int v3 = atoi(val3);

	// Apply the three channels
	DmxSimple.write(c, v1);
	DmxSimple.write(c + 1, v2);
	DmxSimple.write(c + 2, v3);
}

I send the Arduino a string via MQTT like: 001255255255

  • First three characters is the starting channel value. Values of 001 to 512.
  • Next three characters is the starting channel’s value [R]. Values of 000 to 255.
  • Next three characters is the second channel’s value [G]. Values of 000 to 255.
  • Final three characters is the third channel’s value [B]. Values of 000 to 255.

Changing a room of four downlights (to warm white) would send 4 MQTT messages (payloads) to the topic device/house/light , of:
001255195054 . (Downlight on channel 1 = 1,2,3 = R:255, G:195, B: 054)
004255195054 . (Downlight on channel 4 = 4,5,6 = R:255, G:195, B: 054)
007255195054 . (Downlight on channel 7 = 7,8,9 = R:255, G:195, B: 054)
010255195054 . (Downlight on channel 10 = 10,11,12 = R 255, G:195, B: 054)

Edit
You could of course set all downlights in each room to the same starting channel (address?) and then send only one message. But with so many free channels per universe I thought it would be more fun if each downlight could do it’s own thing :stuck_out_tongue:

2 Likes

Thanks Chris,
I have it up and running, ran into rookie issues, I’ll list them in case anyone else jumps on this feed in future with issues. Other than below, after setting up the MQTT broker, Node red & OpenHabian it worked no worries.

1. Below is the pin configuration for programming the Arduino with DMX Header onboard - via usb/serial.

2. Below is the pin configuration for running via MQTT

3. Put more than 5V to the Arduino!
IDK what I was thinking when I pulled the 5V pack out and tried to run it, but it didn’t work… lights were on but no-one home. Put 12V to it and hmm… we have light :wink:

4. Check the DMX fixture library of your lamp/fixture
So almost all LX fixtures in the theatre industry come with more than DMX 3 channels assigned to them,
In Chris’s case, he had 3 channels per DMX decoder, so the channel logic is:
Lamp #1 = DMX Channel 1-3
C1=Red
C2=Green
C3=Blue.

Lamp #2 = DMX Channel 4-6
Lamp #3 =DMX Channel 7-9 etc.

Thou in my case, I have 7 channels per fixture. So 1-7
Lamp #1 = DMX Channel 1-7.
C1=Master Fade
C2=Red
C3=Green
C4=Blue
C5=Strobe
C6=Without
C7=Color Walking

Lamp #2 = DMX Channel 8-14
Lamp #3 =DMX Channel 15-21 etc.

I am not going to be using these fixtures for the install they are just DMX fixtures I have in stock , but I wanted to mention in case someone else run into this. It’s basic DMX stuff to a theatre tech but maybe not to others.

But in my case after some alterations to the code, I now input a string looking like this:
001255255000000000000000
=Red @ 100%

001(Fixture)255(Master Fade to full) 255 (Red to full) 000 null after as I don’t want green, blue, strobe, gap or color changing.

1 Like

Hi @chris, I am wanting to add in a fade time thou now (Standard fade time of 3 seconds)
as Light transitions are what it makes it feel above and beyond to a general user.

Snapping on and off seems a waste with such a control device, I like to rack your brain if you have considered this as I’m not sure if this would be best handled by the Ardunio or NodeRed or other.

Yes, I should have mentioned that I switched the jumpers. Nice post.

If you’re never going to modify the Strobe, Gap, Walking values, You could shorten your MQTT payload for only the values you will ever modify - save your arduino from doing extra processing (may speed up responsiveness to each MQTT payload). And just hard set those values during your setup().

I too have thought about transitions. My thinking is handle it in NodeRed. Otherwise the Arduino would have a crazy amount of arrays to store the current colour, target colour and current animation “step”, for every colour channel :grimacing: (to allow for different animations/rooms to be occurring at once).

I haven’t fleshed it out yet in NodeRed, but I imagine a function node that’s passed-in it’s start colour, target colour and current animation “step”, works out the next colour step sends that via MQTT to the Arduino. As well as a short delay node which then loops back into the function node repeating the steps until the animation is complete or interrupted with new instructions.

I built my first custom node for this project. Takes homeKit’s HSV(B) values and converts them into RGB values for use with DMX. I will publicly release shortly, but first I’m going to add white balance settings into it as the real-world downlights never match the selected colour on the screen due to the downlight having different intensities per channel.

Could perhaps build another custom node to handle RGB transitions internally.

Here’s my current configuration for one room (no animation):

"JSON" function node:

// Convert MQTT string into json object - for homeKit node's input
// Eg: {"Saturation": 79, "Hue": 42, "Brightness": 0, "On": true }
msg.payload = JSON.parse(msg.payload);
return msg;

"DMX 016" function node:

// Pad zero(s) in-front of each R,G,B value to create numbers with 3 digits each.
msg.payload[0] =  String(msg.payload[0]).padStart(3, '0');
msg.payload[1] =  String(msg.payload[1]).padStart(3, '0');
msg.payload[2] =  String(msg.payload[2]).padStart(3, '0');

// Inject the starting channel into string, then R,G,B values
// Eg: 016255255255
msg.payload = "016" + msg.payload[0] + "" + msg.payload[1] + "" + msg.payload[2];

return msg;

This is the same for the other “DMX #” function nodes, replacing the starting channel as per function-label.

1 Like

Should mention that my setup (pictured above) has two methods of input. Either via the MQTT nodes pictured very left, or via the homeKit nodes pictured in the middle, per downlight. (Thirdly via the Inject node for setting defaults during boot up).

homeKit is controlled via Siri/iOS Home app. MQTT nodes are used when the system automatically sets the light’s state or when I press on the light switches, which then syncs back into iOS Home app via the JSON nodes.